


Coast Seawall has decades of experience in constructing state-of-the-art seawalls, and they are proud to offer their services to you. Our expertise in the design and construction of seawalls is unmatched in the industry.
We’ve put together this general “How to Build, Install, and Repair a Seawall” guide to serve as a helpful reference and provide an overview of the process involved. You can always get in touch with seawall construction near me if you need more detailed help or have any questions!
1. Research Local Rules and Regulations
Learn about local rules and regulations.
Make a list of any local permissions, unique codes, or rules you would need to follow or apply for. This is a critical step in any business or residential construction project. This assures that you will finish your job without messing with the environment, both in and out of the water.
Depending on where you live, you may or may not need permissions or follow restrictions. Some require USACOE (army corp) licenses, some the Department of National Resources (DNR), and others only local permits. Each state, county, or even lake is different.
2. Measure Twice, Drive Once
Before you begin, you’ll need to know how much and what kind of seawall materials you’ll need. The cost of a seawall can vary substantially depending on the materials utilized. The materials used are usually chosen with the environment’s needs in mind. Lighter, shorter items can be used in a small canal or golf lake, whereas oceanfront requires stronger, deeper-driven sheets.
3. Set Up Your Drive Guide
A driving guide is horizontal; typically wood device is used to keep your sheets aligned throughout the sheet driving operation. Putting together a drive guide before installing a seawall gives you a precise wall position during installation. The drive guide is essential for ensuring a straight and solidly built wall. Drive guides are required; do not attempt to drive sheets down a string line alone.
Installing temporary posts is the first step in configuring your drive guide. For proper pole placement, run a string line where the wall will stand. We recommend utilizing posts that are 4″ x 4″ in size. Please remember that the string line is only used for pole placement to create a drive guide, not for the wall itself.
The drive guide should be four to six feet by six feet in size and can form part of the permanent construction for a wood-capped wall. Attach your drive guide to the temporary posts by tack nailing, screwing, or clamping it in place.
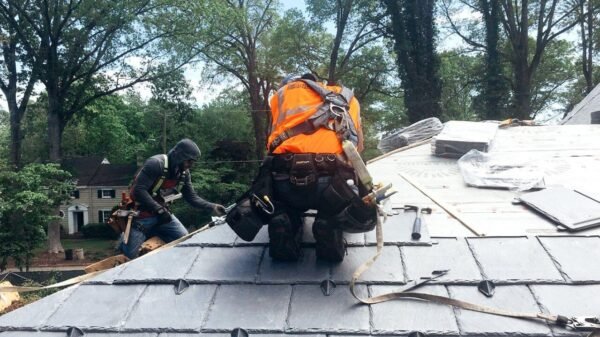
4. Drive Your Sheets
When using Z panel sheets (as opposed to whole box sheets), sheets are frequently “threaded,” or pushed in pairs side by side. This reduces installation time and ensures that your sheets remain aligned during the driving operation. The term “Z panel” refers to the profile shape of the sheet.
Before driving, double-check that each pair of sheets is aligned horizontally and vertically. The initial set of sheets you install must be straight and upright to follow suit for the rest of the wall. If you meet difficult soils, you have the option of switching from one single sheet to the next.
We recommend beginning with the male component to allow soil and debris to escape via the female. After you’ve reached your chosen embedment point, screw a lag screw into the flange of the pair’s top sheet.
5. Waler Boards that are secure
Continue constructing your seawall by installing front or back walers and securing them with carriage bolts or all-thread (AT) rods. Carriage bolts (or AT) should be used every 2’–3′ between tie rod placement.
Tie rods should be attached via the waler’s front and back. The tie rod should be fastened to a deadman behind the wall once it has passed through your waler. Backfill will then be used to conceal the tie rods and deadman.
Walers are typically made of wood and are installed during the construction of your driver guide. Walers are usually a permanent element of the seawall. On the other hand, walls without a wooden top cap can employ steel or another robust material to make up the driving guide.
6. Complete the installation process.
The installation of the top cap board will complete the look of your wall. It is typical for a pressure-treated 2″x12″ board or deck to be used as the full cap board, which should be installed perpendicular to the walers.
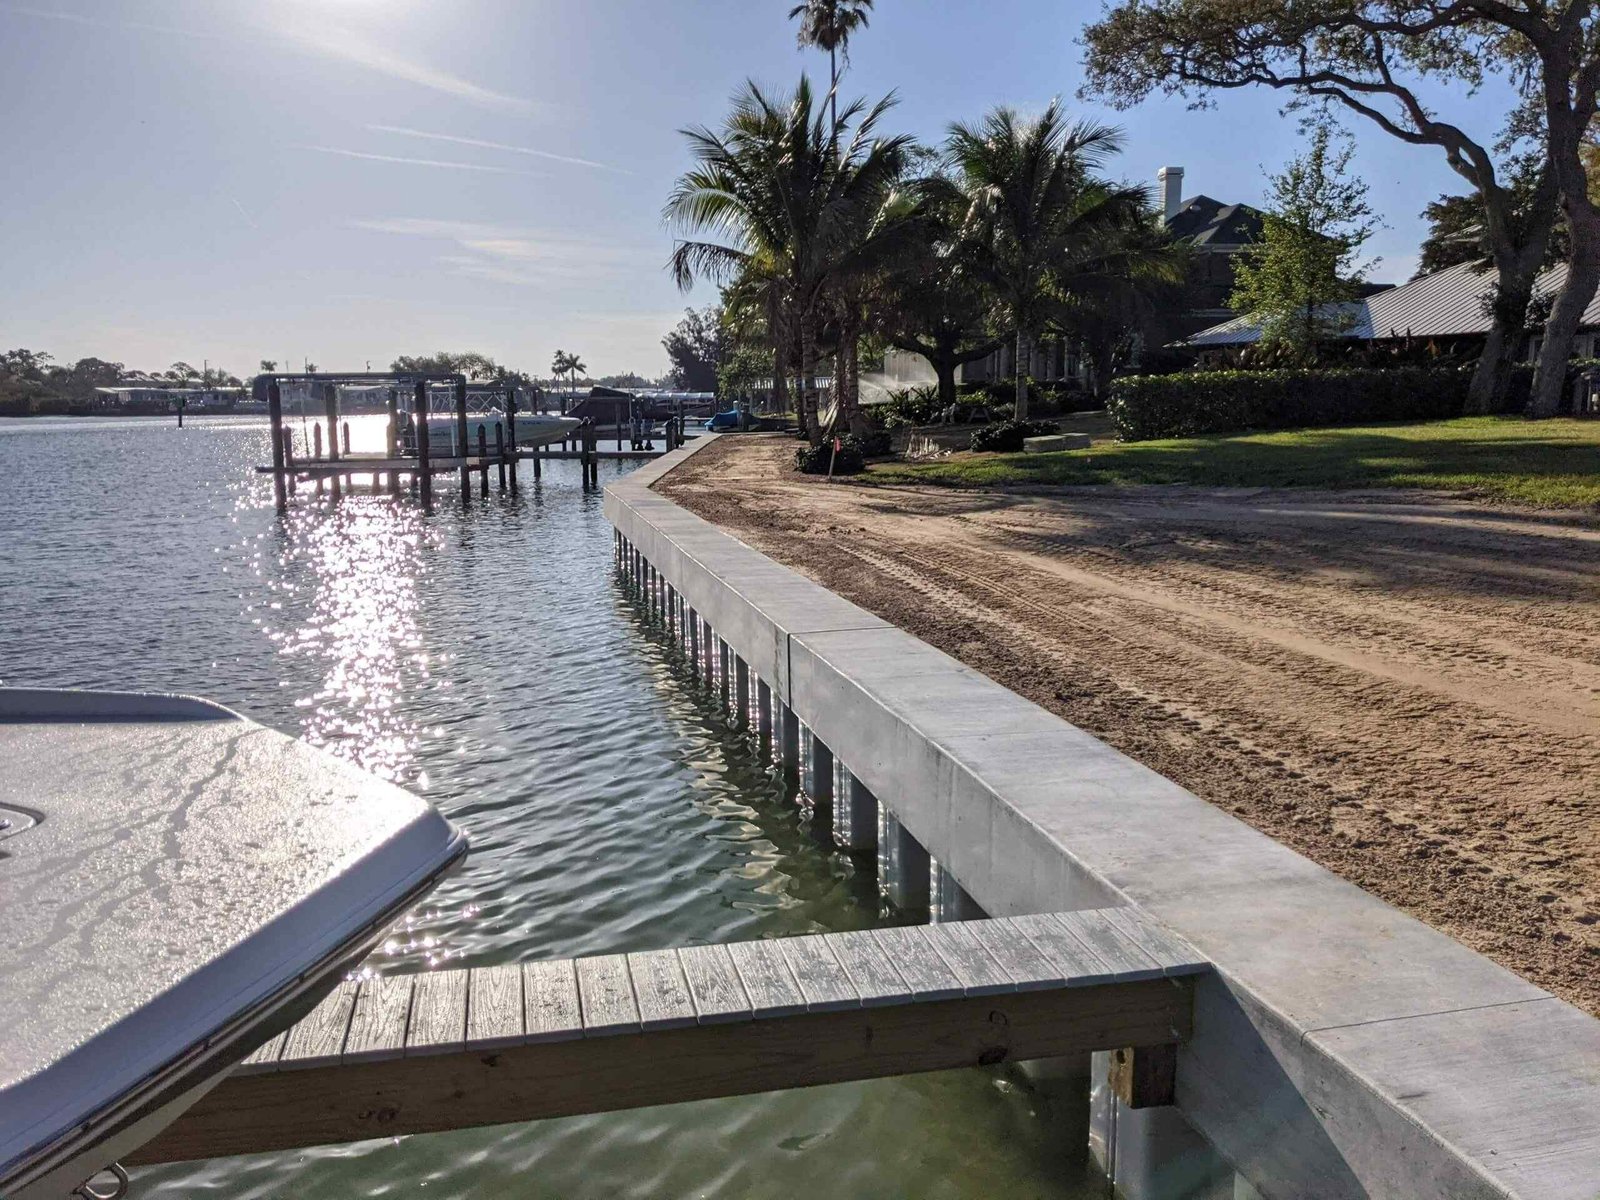
Repairing a Seawall (with Steps)
As long as they are correctly erected, seawalls are a genius. They contribute to reducing soil erosion into bodies of water and provide an excellent service in safeguarding your home and belongings from damage. Compression and corrosion are visible on seawalls as they become older. Moisture seeps through cracks in a seawall due to pressure fluctuations, which causes the seawall to lose strength and eventually collapse gradually. Sinkholes, run-off, and regions of depleted soil may result as a result of this process, as well. Seawalls are a must-have for everyone who lives near the water. You should contact a professional as soon as you feel your seawall fails to avoid potentially hazardous situations on your property.
It will be possible for the specialist to evaluate your seawall to determine its current state and whether or not it requires repair. In response to the flow of the waves, the water is driven through minor cracks, joints, and other faults that develop over time. It is pretty simple to miss the harm until it is too late to reverse the situation. You will be on the lookout for visible cracking, broken pieces, leaning/bowing/bulging of the wall, gaps, erosion behind the wall, and sinkholes, among other signs of trouble. It is far easier to repair your seawall than build a new seawall; therefore, it is essential not to waste time if you suspect damage.
What is the approximate cost of repairing a seawall?
Repairing a seawall is not a long-term solution, although it is rational in some circumstances. The seawall is subjected to the wrath of Mother Nature daily, and it will require maintenance in the future. If your have concrete seawall than concrete contains iron rebar, which erodes over time due to exposure to the elements. It will eventually begin to lose its power to strengthen itself. The concrete will start to fracture and give way due to the applied pressure. Because it is impossible to fix concrete while the wall is submerged adequately, large parts will probably need to be replaced.
Sometimes the replacement portions will be made of a different material from the original sections. Professionals in concrete seawall construction will fill up the holes and cracks, build another water-tight barrier, and remove any standing water from the seawall. It is only after you have scheduled a meeting with them that they will be able to tell you just what you require.
What are other Alternatives to Repairing my Seawall?
The option of entirely replacing the concrete seawall is an alternative to fixing it. The expense of replacing a seawall can be extremely high, and it can be even more expensive if there is no easy access to the wall. If a barge is required, you will incur additional costs in the tens of thousands of dollars. As a result, restoring the seawall is preferable, provided that the damage is discovered before it is too late to be repaired successfully. As putting a bandage over a severe wound is ineffective, the importance of timing cannot be overstated when it comes to treating the damage.
You should contact Coast Seawall as soon as you suspect that concrete seawall repair is required. Although a quick, cost-effective cure may appear enticing, you don’t want to have to go through the same ordeal again soon after the “repair” has been performed. To avoid being a victim of an emergency, you should consult with an expert who can advise and examine your circumstances. The engineers are working around the clock to discuss your specific case.
A team of engineers will collaborate with you and expose you to the latest materials and repair procedures. They will also conduct a soil analysis and evaluate your existing wall as a whole to ensure that it still can provide superior structural integrity in the long run. A concrete seawall created years ago may need to be altered a little to give the best possible protection due to changing factors throughout the years since it was constructed; there is always a way to make it better!